Claude Writes Your Ad Reports.
Cancel the Connector.

Connect your own ad accounts once. Claude pulls Google, Meta and GA4, then writes a rich Google Sheet and a clean client PDF straight to your Drive — graded against your goals. No monthly connector. No data through anyone else's server.
❯ /ads-report
Detected: Google Ads · Meta · GA4
Business type: e-commerce
Pulling May 2026…
→ ROAS 4.0× · CPL €31
✓ Sheet → Drive/Ad Reports/May 2026
✓ PDF → 5-page client report.pdf
Ad Performance Report
Acme Co · May 2026
Spend
€12,050
↓ 3% vs Apr
Revenue
€48,200
↑ 18% vs Apr
ROAS
4.0×
Target 3.5×
Spend vs Revenue — last 4 weeks
Top creatives
Summer Sale — Video
ScalingTestimonial Carousel
WorkingPromo — Static
FatiguingWhat you get — free, no subscription required
The /ads-report skill · pulls Google, Meta & GA4 with your own credentials · writes a Sheet + PDF to your Drive · full setup guide with screenshots
No middleman, and nothing extra to run
The usual ways to pull ad data into a report — a paid connector like Supermetrics, or a hosted integration you authorize into — put your access tokens on someone else's server and route your data through it. This skill does neither: it runs on your own machine, calls Google's, Meta's and Google Analytics' official APIs directly, and keeps every credential in your own file. No subscription, and no separate service to install and keep running.
Your tokens stay local
They live in your own .env file — never on a third-party server.
Straight to the source
Direct calls to the official APIs. No hosted connector in between.
Nothing to run or renew
No subscription, and no separate service to install or keep alive.
Install the skill
Two commands. Then connect whichever platforms you have — the report includes whatever's connected, so you can start with just Meta and add the rest later.
Install Claude Code
Skip if already installed.Claude Code is Anthropic's official CLI. It runs the skill on your own machine, calling each platform's official API directly — nothing routes through anyone else's server.
npm install -g @anthropic-ai/claude-code
Place the skill file
Using ~/.claude/skills/ installs the skill globally — it works from any folder. Then connect whichever platforms you have below; the report includes whatever's connected.
mkdir -p ~/.claude/skills/ads-report
mv ~/Downloads/SKILL.md ~/.claude/skills/ads-report/SKILL.md
Complete setup guide
Ordered easiest-first, so you get a first report in minutes. Every trap is flagged. Start with Meta and Analytics — Google Ads is optional and comes last.
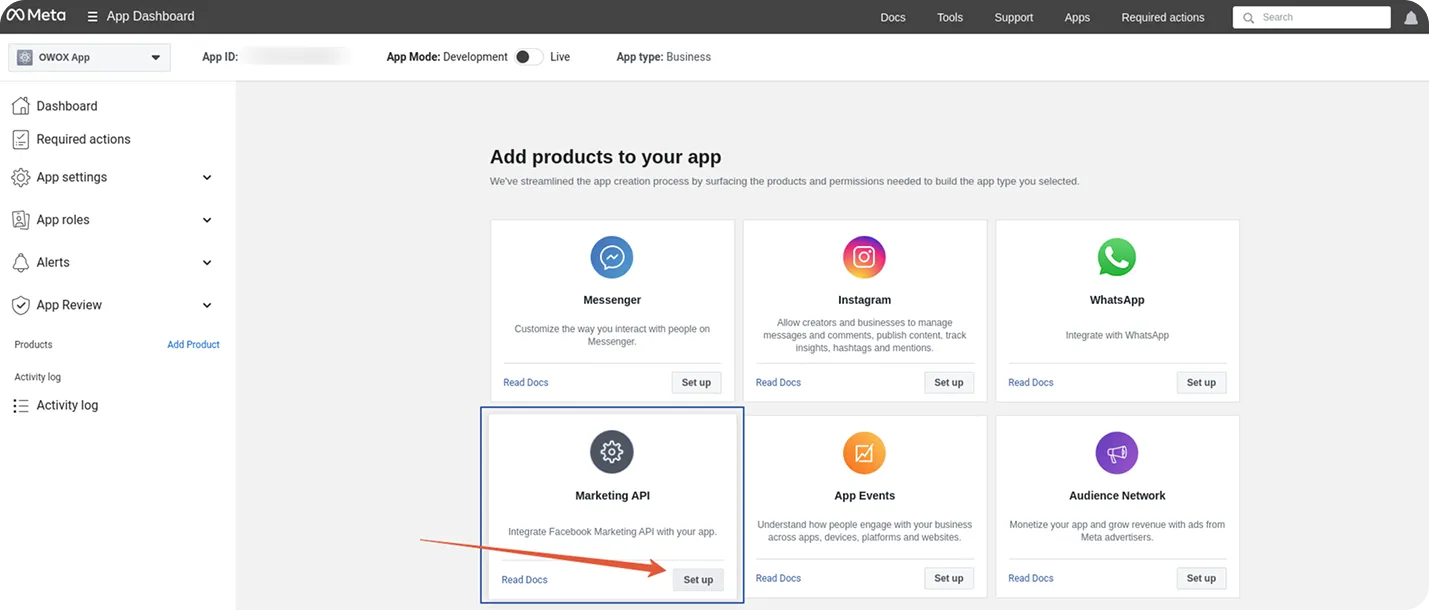
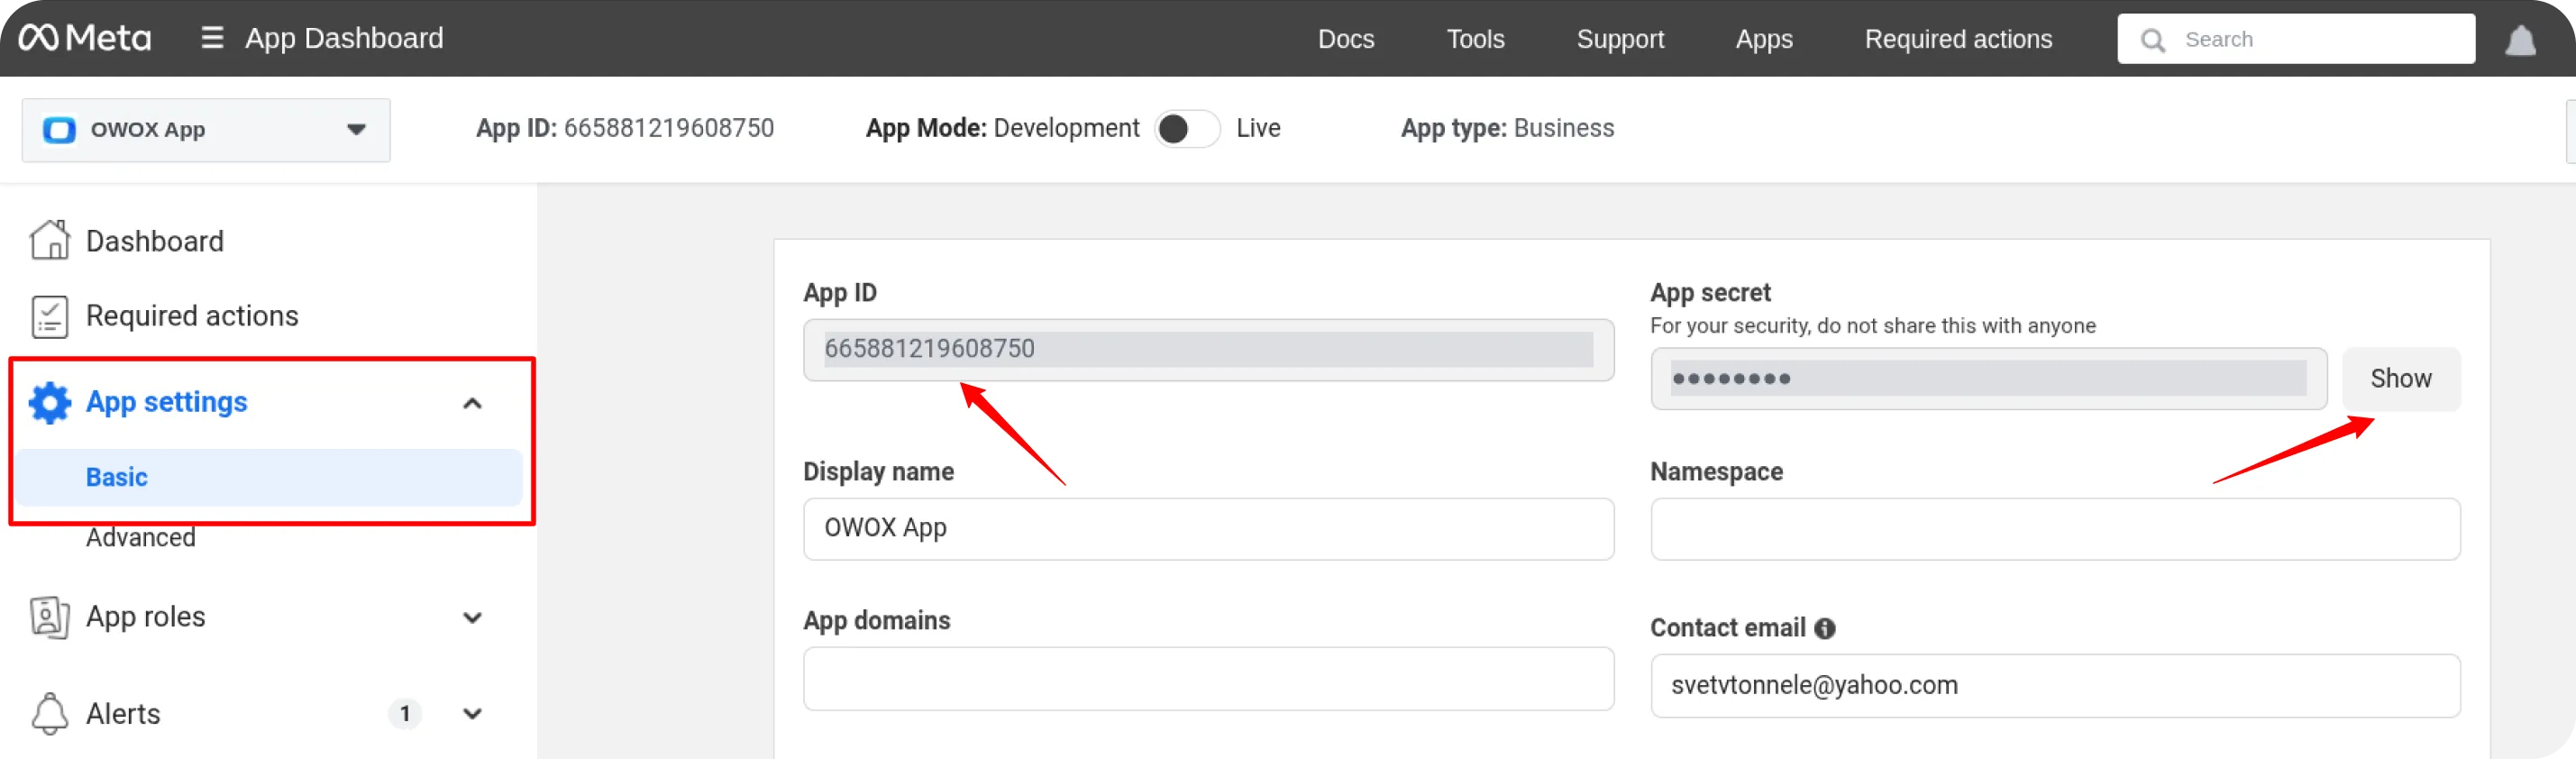
Create a Meta app
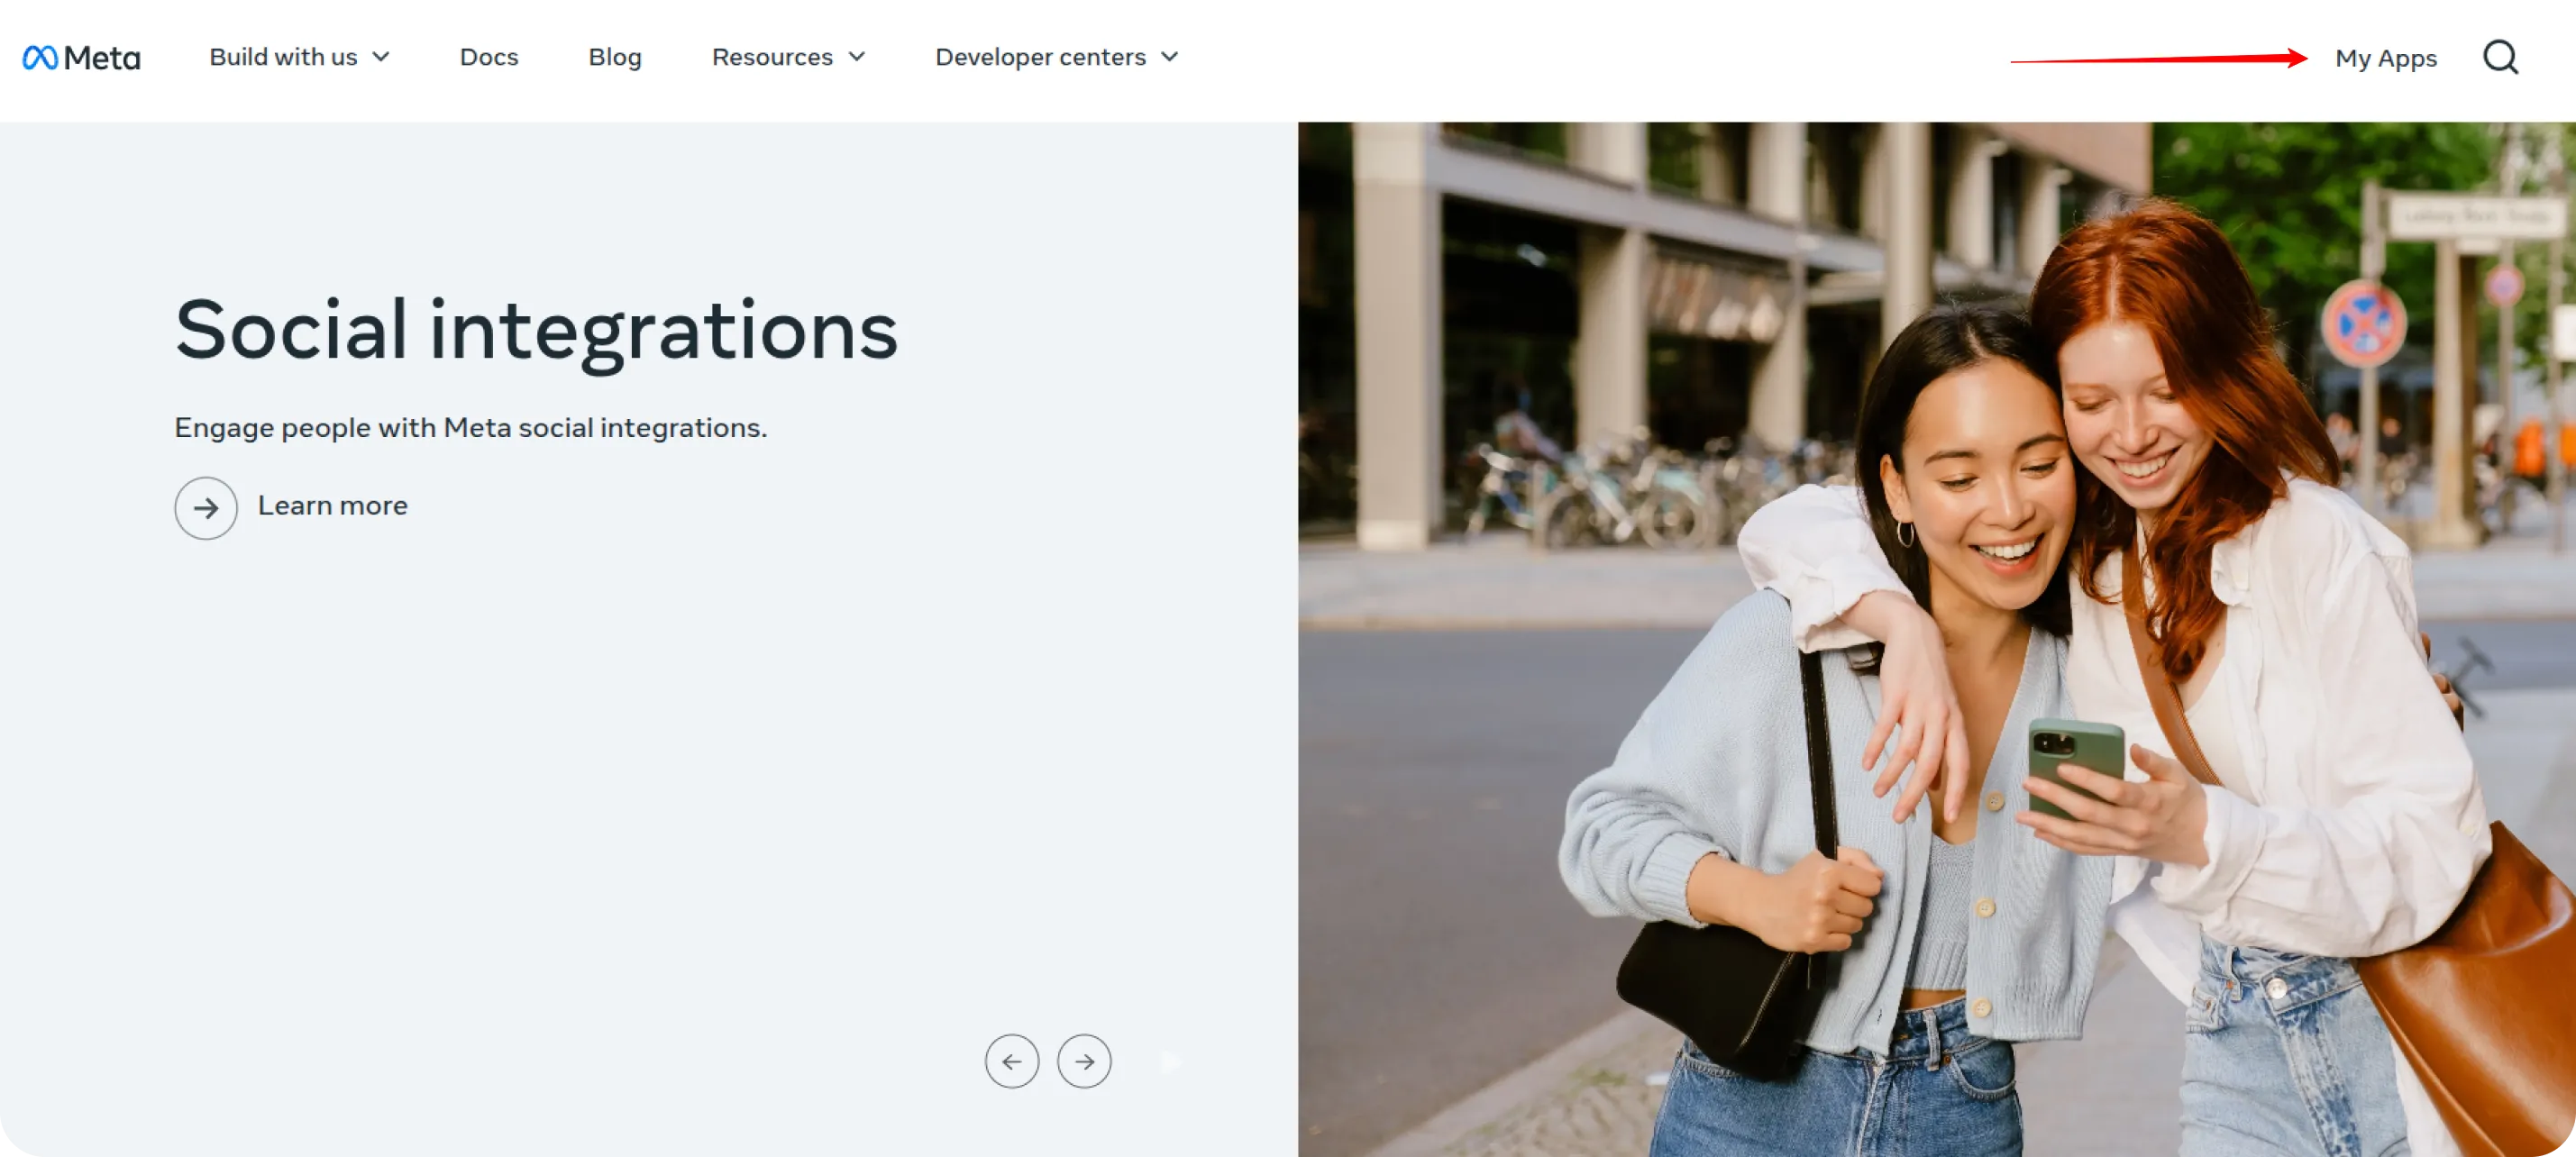
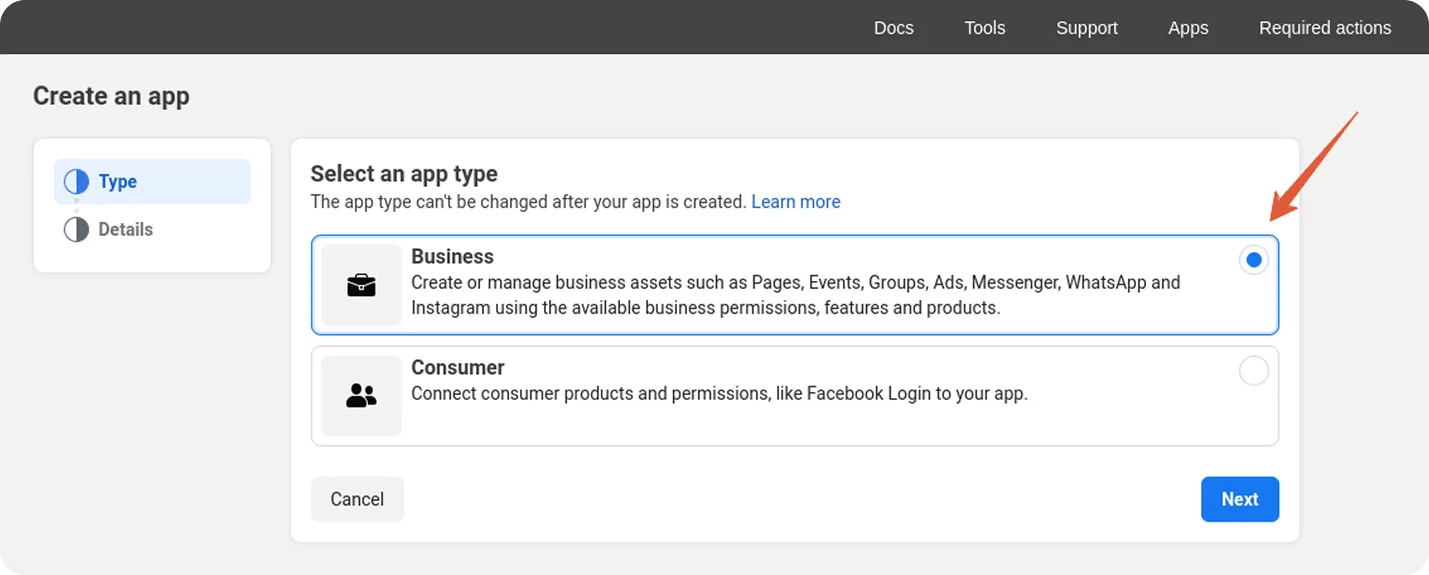
The flow changed — it's "Other" then "Business", not a single Business choice.Go to developers.facebook.com → My Apps → Create App. When asked for a use case choose "Other", then on the next screen pick app type "Business". Name it and select the business that owns your ad account.
Create a System User
Go to business.facebook.com → Business Settings → Users → System Users → Add. Name it and give it the Admin role. A system user is what gives you a token that doesn't expire — unlike the temporary tokens most guides use.
Business Settings → Users → System Users → Add
Give the System User your app and ad account
With the system user selected, click Add Assets twice:
- →Add Assets → Apps → select your app → grant Full control
- →Add Assets → Ad Accounts → select your account → grant View performance (read-only is enough)
Assigning the app and the ad account to the system user
Generate the token with ads_read
Click Generate New Token, pick your app, tick the ads_read permission, and Generate. Copy the token immediately — it's only shown once.
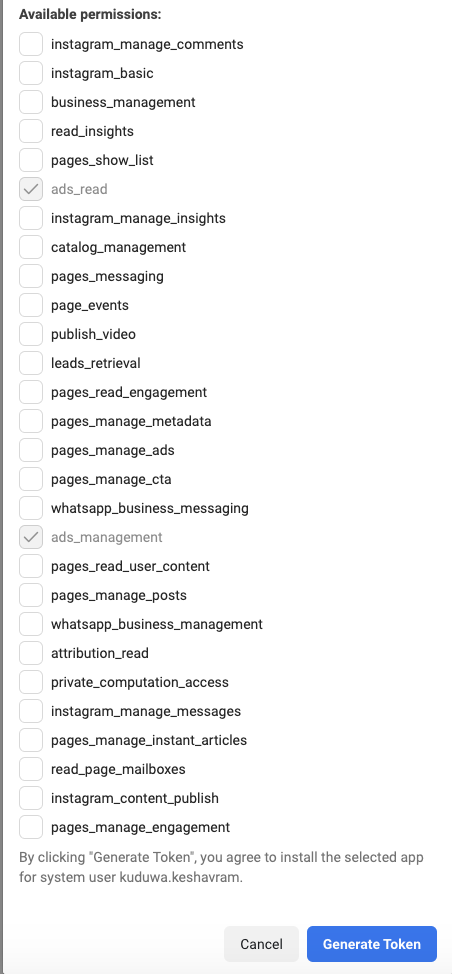
Token dialog — tick ads_read then Generate
via Savant LabsFind your ad account ID
In Ads Manager, the account ID is in the top-left account dropdown. It always starts with act_ followed by digits — that's your META_AD_ACCOUNT_ID.
The act_XXXXXXXX account ID in Ads Manager
Create a Google Cloud project
Go to console.cloud.google.com and create a project (or pick one). This same project and service account will also handle saving reports to your Drive — you set it up once.
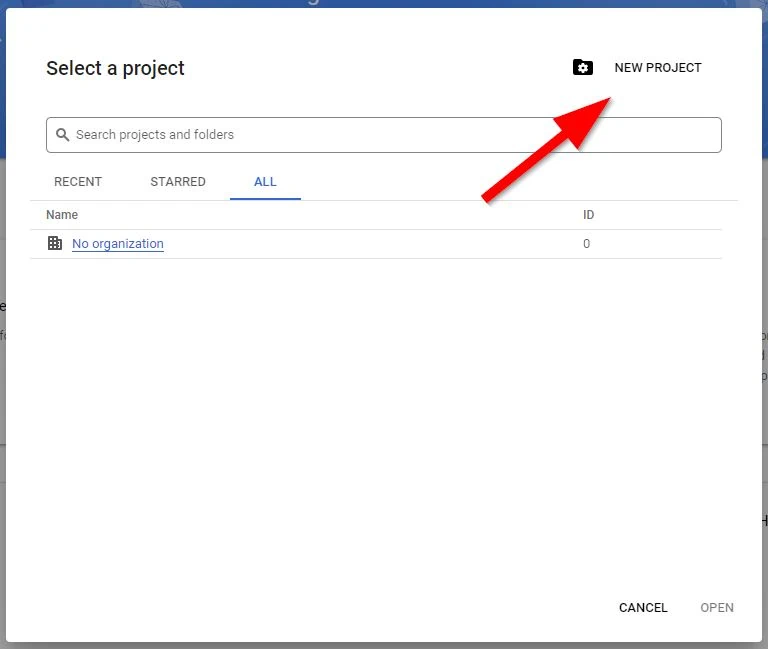
Click New Project in the project picker
via Lupage Digital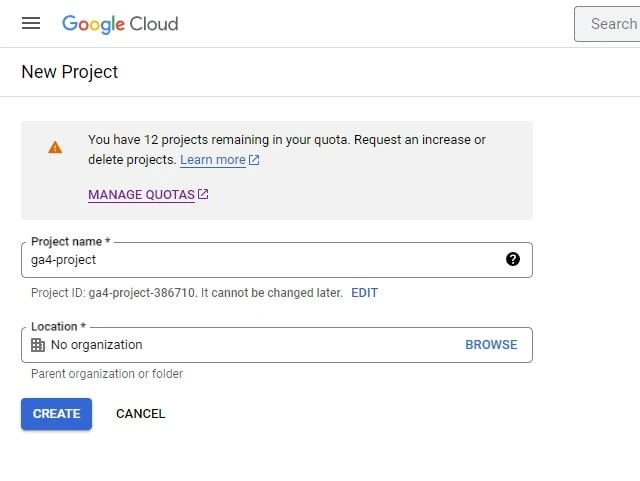
Give it a name and click Create
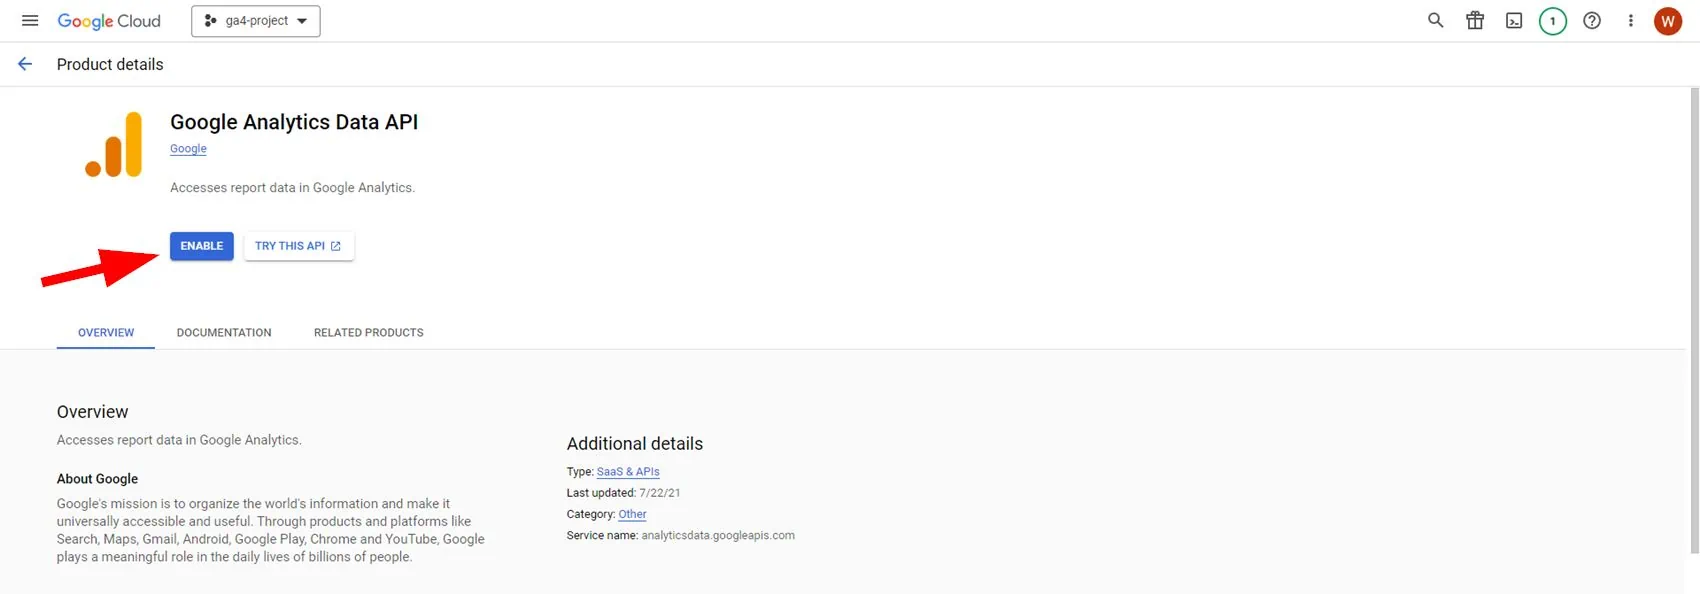
via Lupage DigitalEnable the Google Analytics Data API
In APIs & Services → Library, search for "Google Analytics Data API" and click Enable.
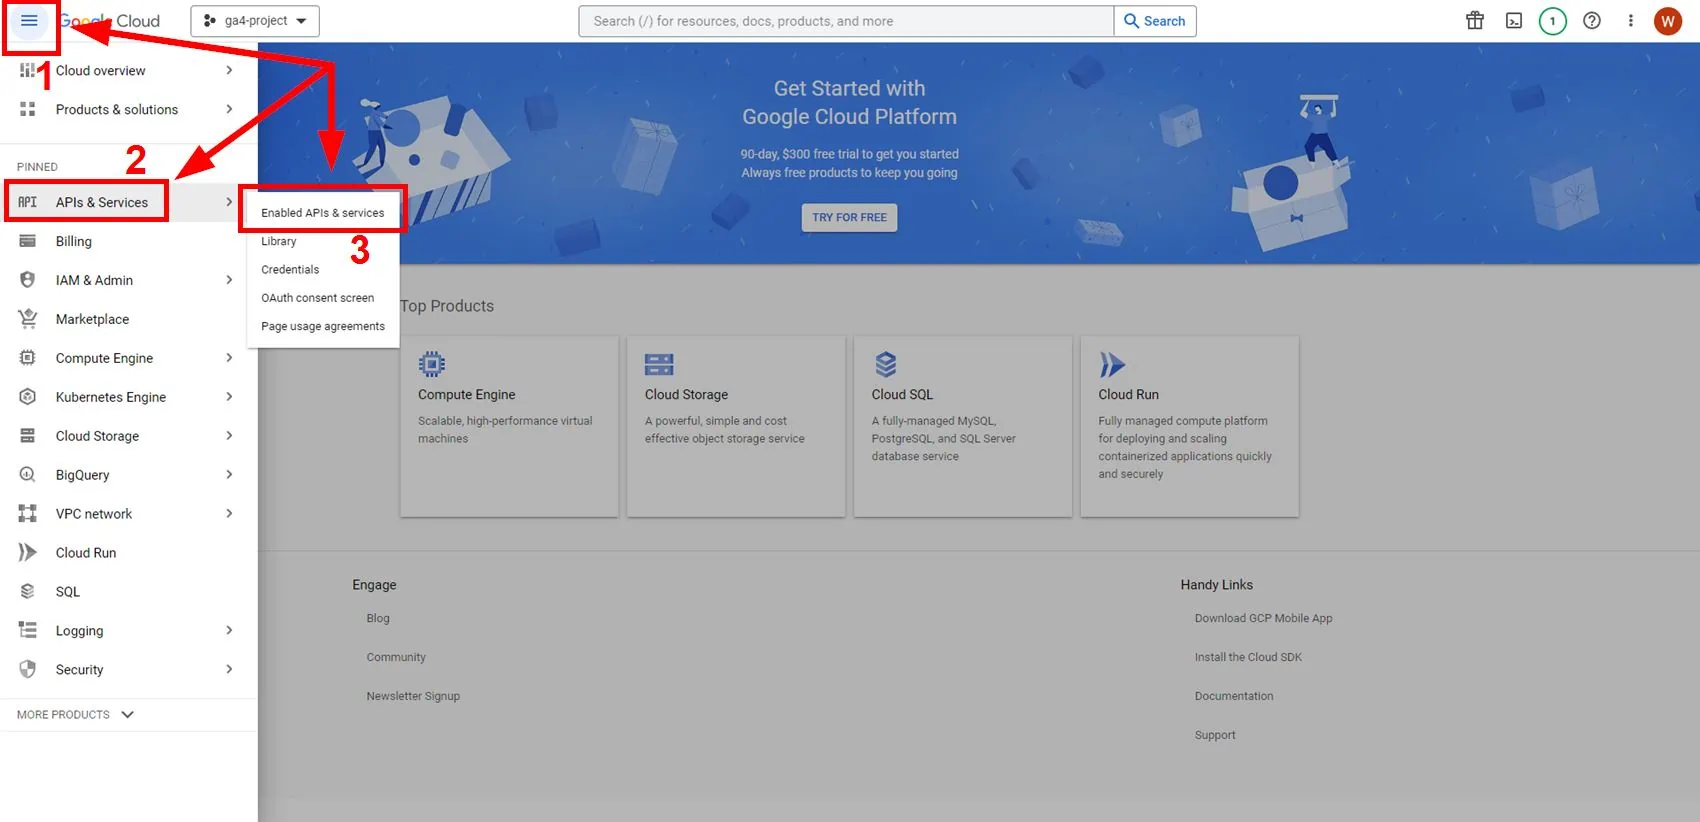
APIs & Services → Library — search and Enable the Analytics Data API
via Lupage DigitalCreate a service account and download its key
Go to IAM & Admin → Service Accounts → Create service account, name it, and finish. Then open it → Keys → Add key → Create new key → JSON. A JSON file downloads — that file IS the credential the skill uses.
IAM & Admin → Service Accounts → Create
via Lupage Digital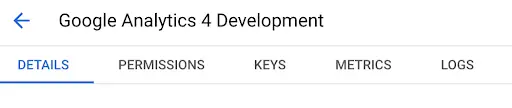
Open the account → Keys → Add key → JSON
via ContentfulGive the service account access in GA4
Copy the service account's email (it looks like name@your-project.iam.gserviceaccount.com). In GA4 go to Admin → Property Access Management → "+" → Add users, paste that email, set the role to Viewer, untick "Notify by email", and Add.
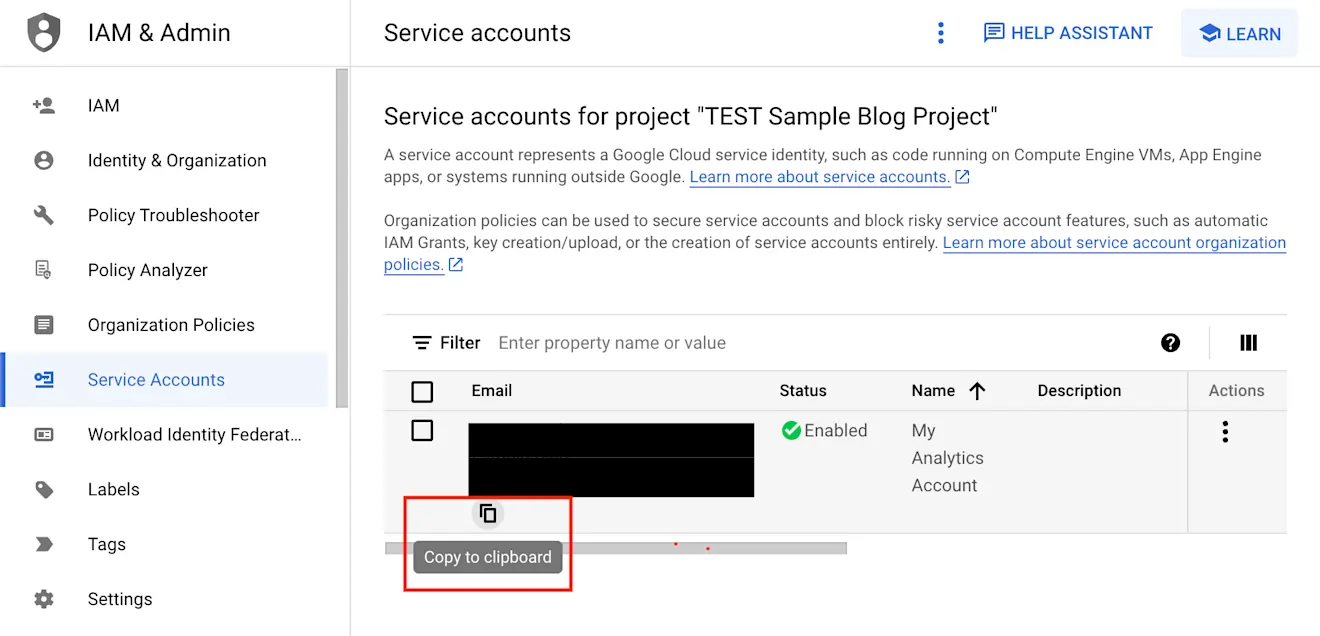
GA4 Admin → Property Access Management → add the email as Viewer
via Contentful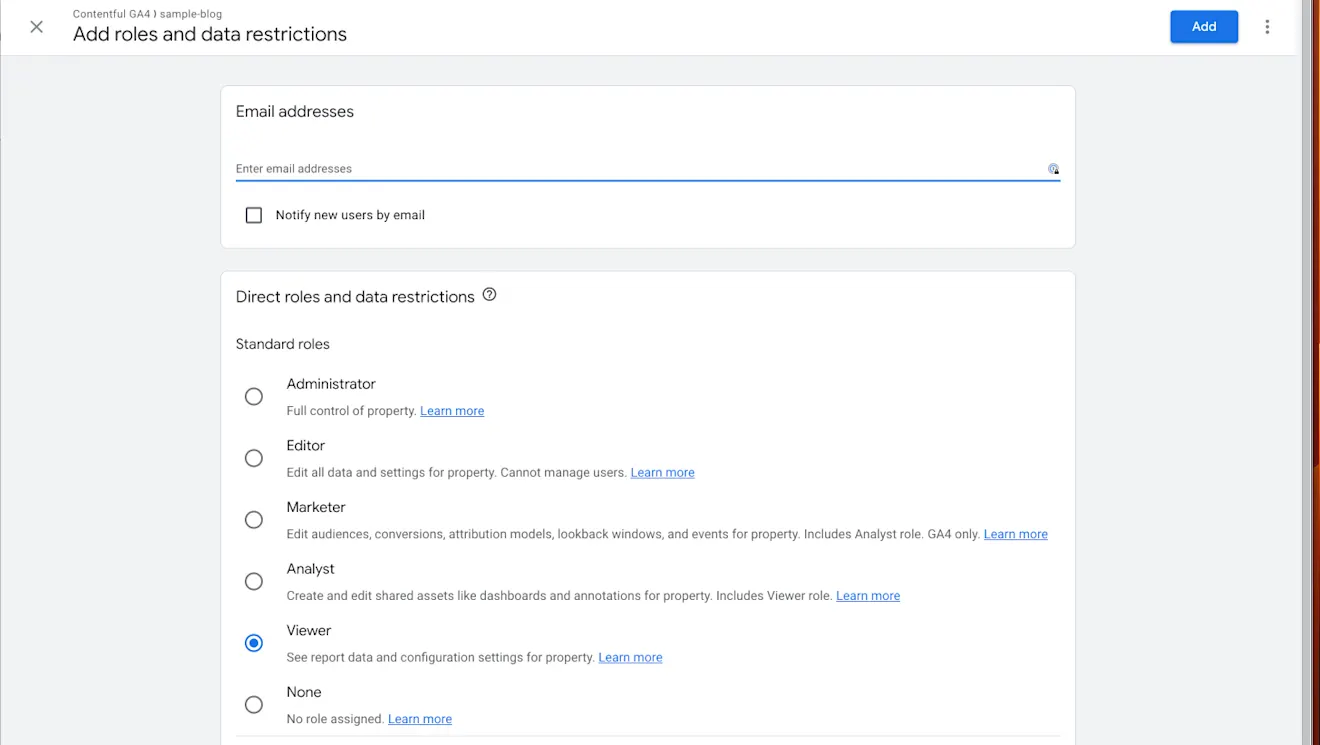
Set role to Viewer and click Add
via ContentfulCopy your GA4 Property ID
In GA4 → Admin → Property Settings, copy the numeric Property ID — that's your GA4_PROPERTY_ID.
Enable the Drive and Sheets APIs
Back in the same Cloud project, open APIs & Services → Library and enable both "Google Drive API" and "Google Sheets API".
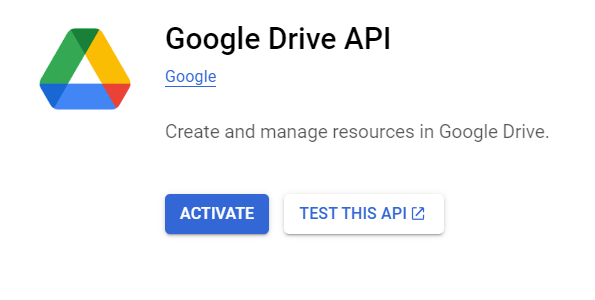
API Library — search Google Drive API and click Enable (same screen for Sheets)
via ScriptcaseCreate a Shared Drive
In Google Drive, create a Shared Drive (left sidebar → Shared drives → New). This is where your reports will land.
Add the service account to the Shared Drive
Open the Shared Drive → Manage members → paste the same service-account email → set its role to Content manager. Now the skill can write your Sheet and PDF into it.
Adding the service-account email to the Shared Drive as Content manager
Copy the Shared Drive ID
Open the Shared Drive and copy the long ID from the browser URL (the part after /folders/). That's your REPORT_DRIVE_FOLDER_ID.
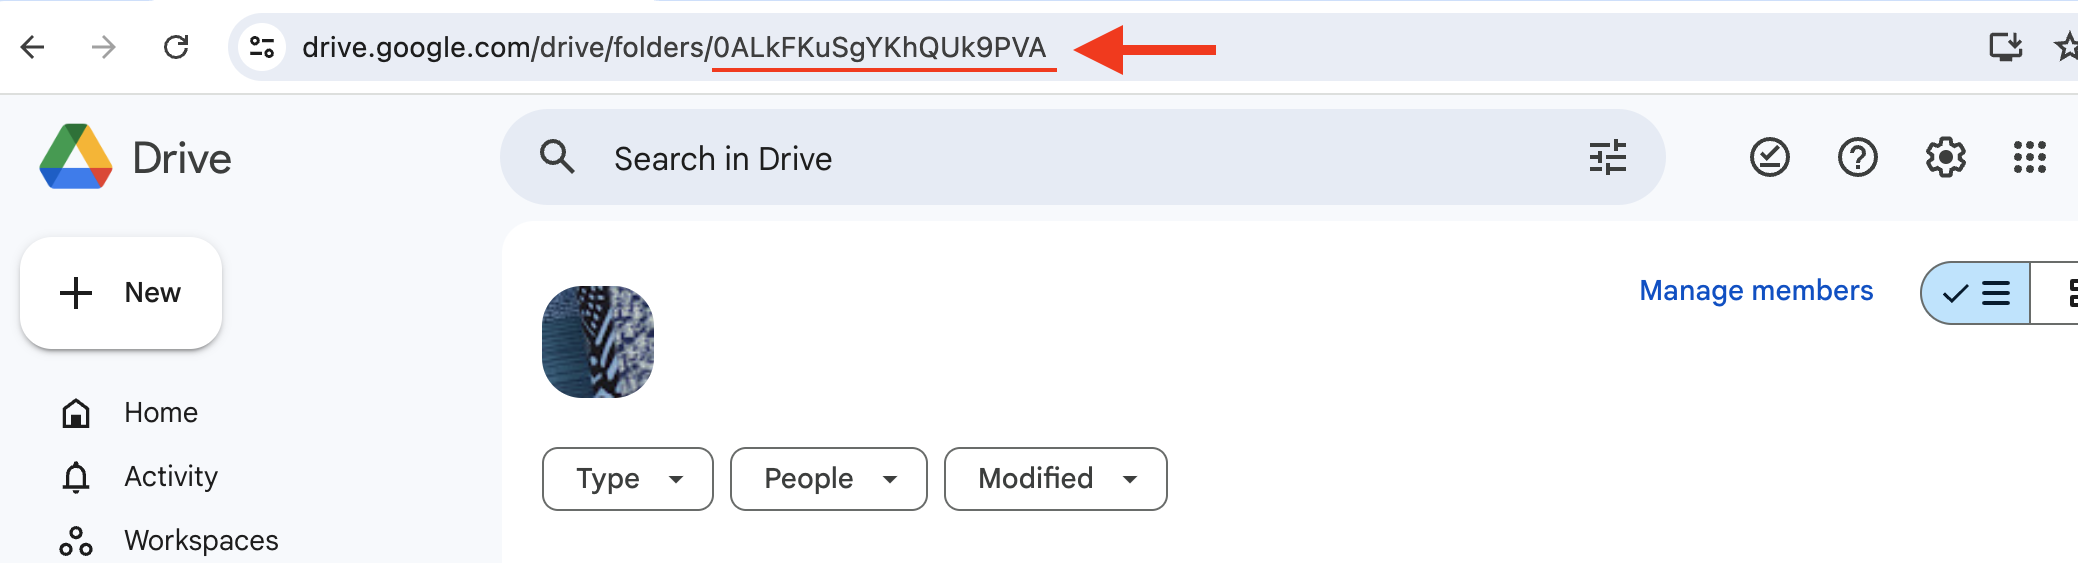
The Shared Drive ID in the browser URL
via Stanford UITUse a Manager (MCC) account
Create one at ads.google.com/home/tools/manager-accounts/ if you don't have it.The developer token lives only inside a Manager account. If you only have one ad account, create a free Manager account and link your account under it.
Linking your ad account under a Manager (MCC) account
Get your developer token
In your Manager account go to Admin → API Center and copy your developer token.
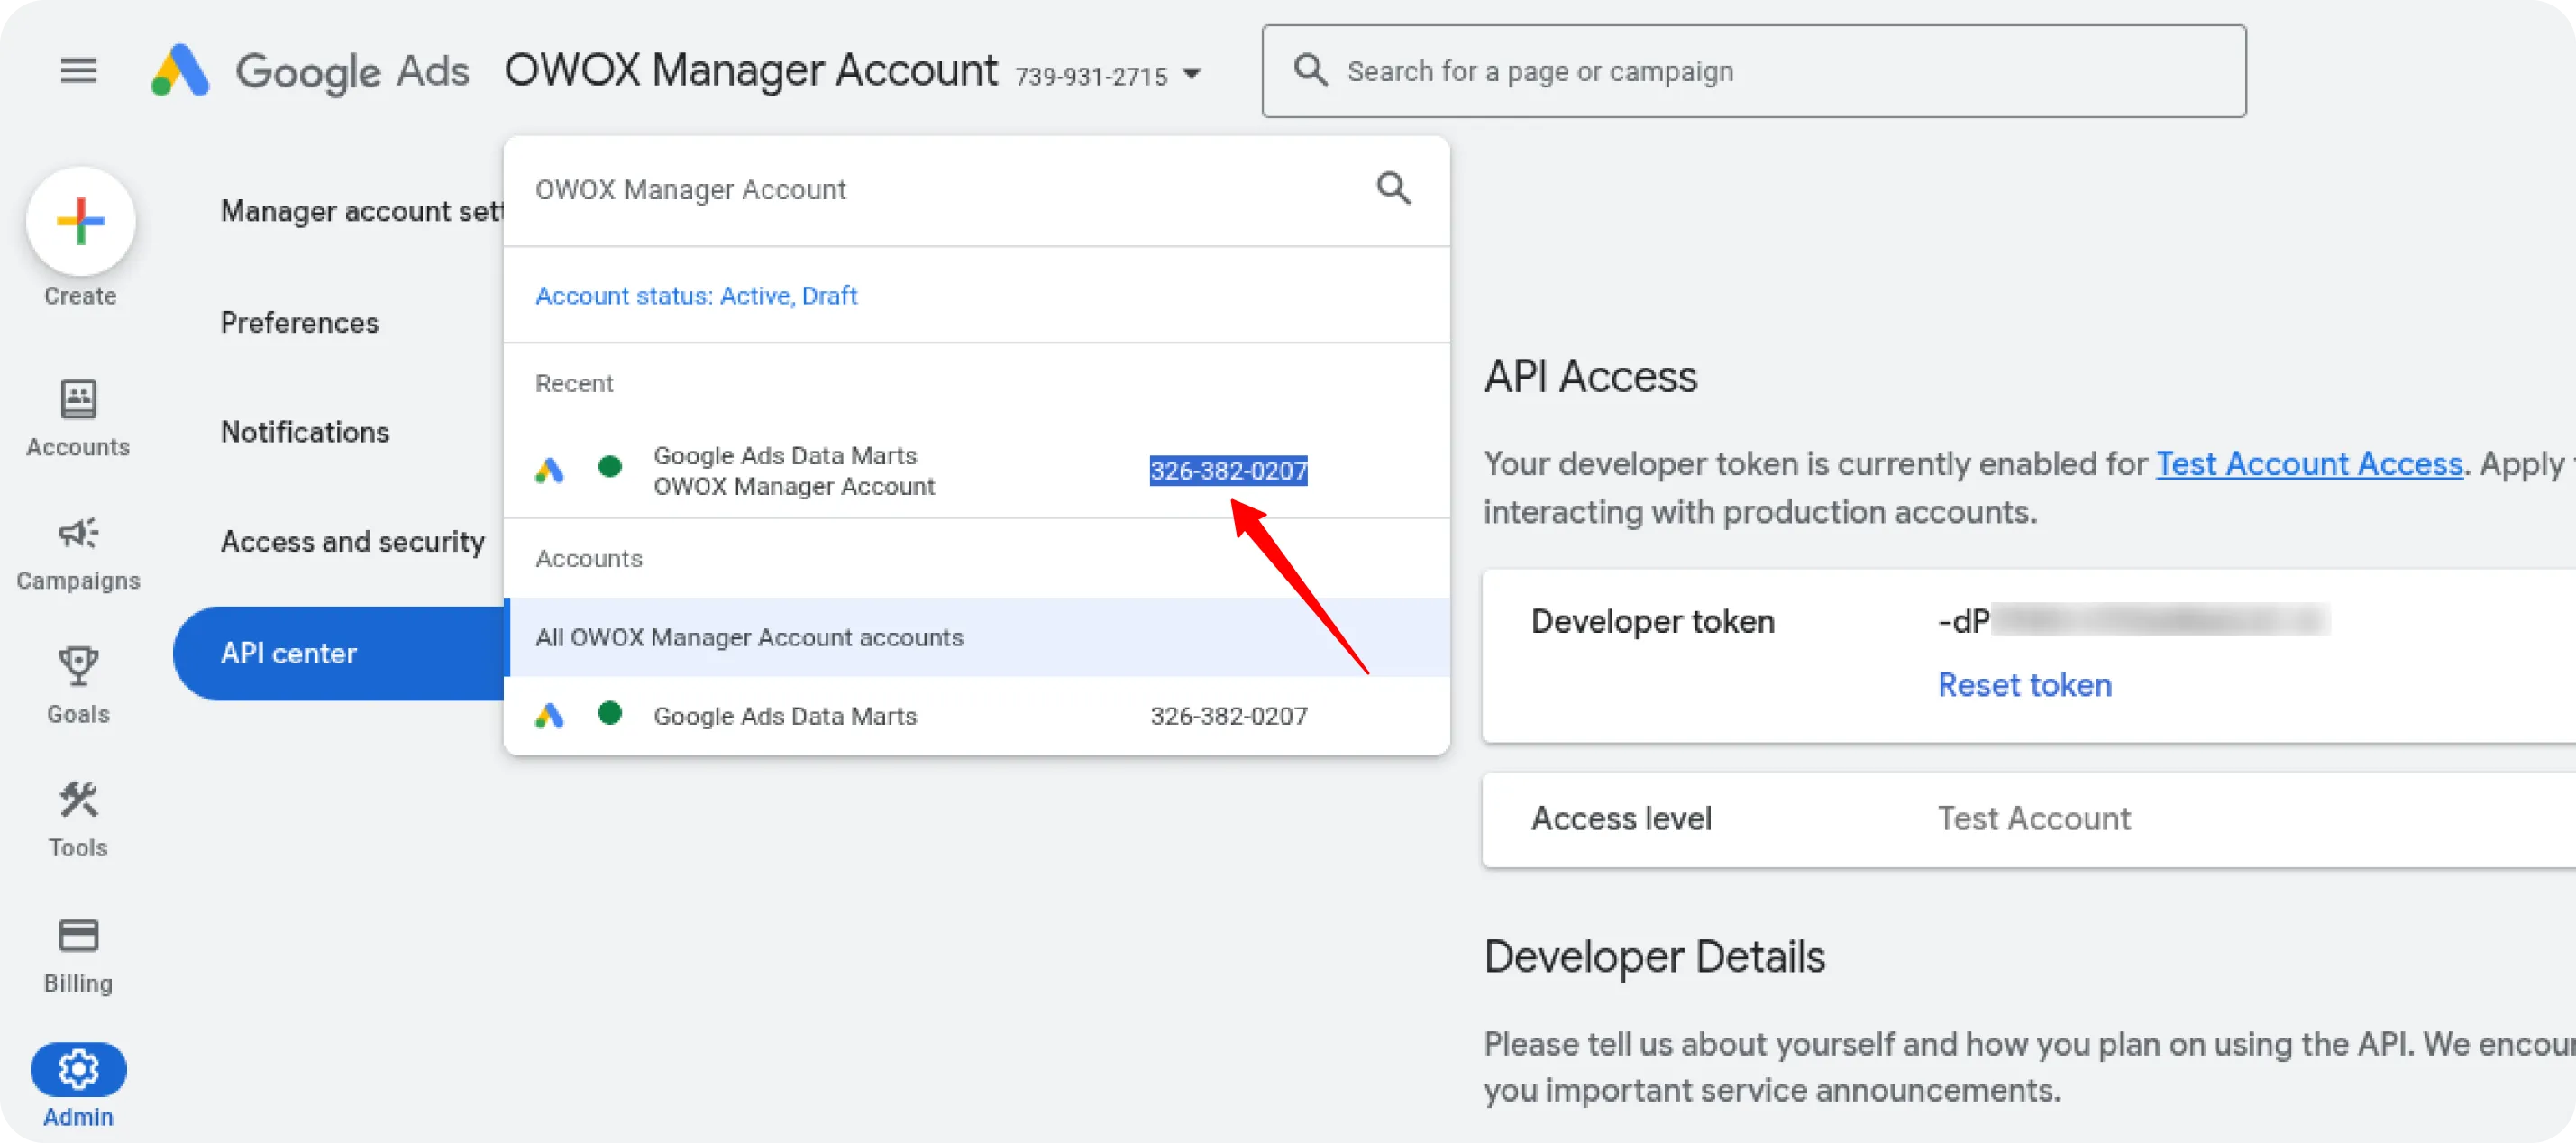
Developer token in the Google Ads API Center
via OWOXCreate a clean Cloud project and enable the Google Ads API
Create a fresh Google Cloud project, then APIs & Services → Library → enable the Google Ads API.
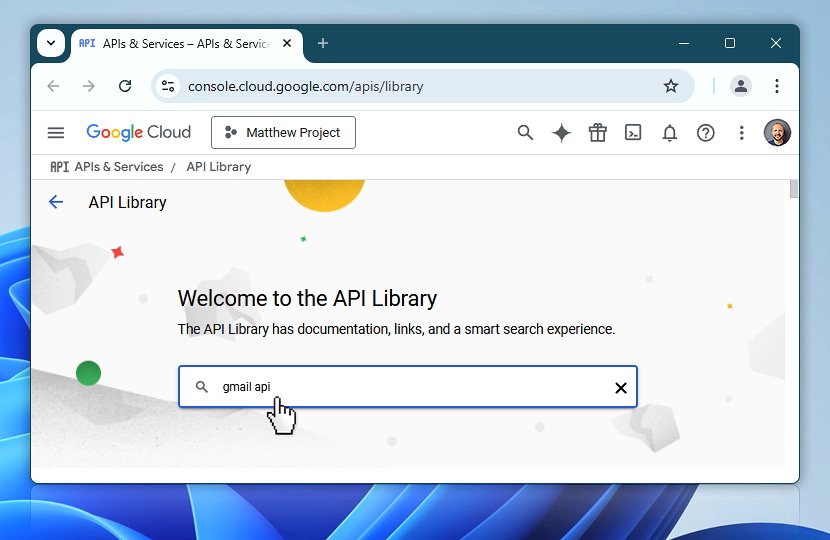
API Library — search Google Ads API and click Enable
via FebootiCreate a Desktop OAuth client
Configure the OAuth consent screen (External; add yourself as a test user), then Credentials → Create credentials → OAuth client ID → application type Desktop app. Copy the Client ID and Client Secret.
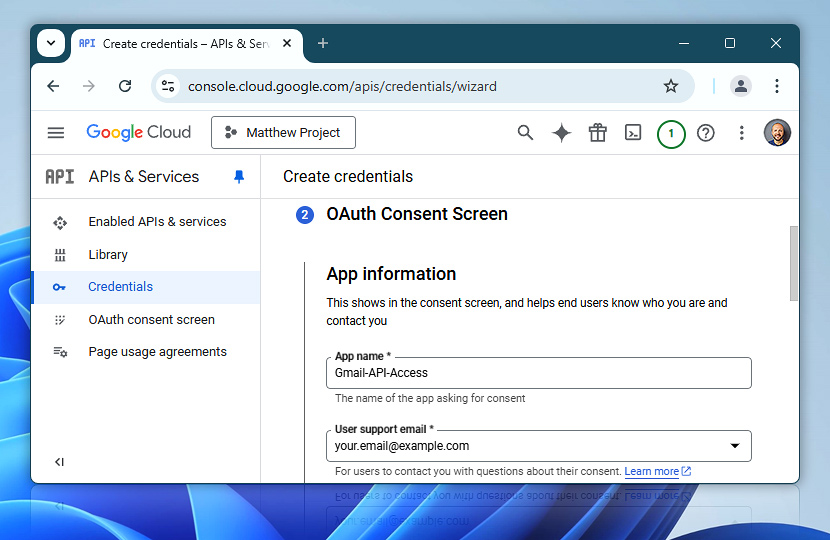
OAuth consent screen — fill in app name and email
via Febooti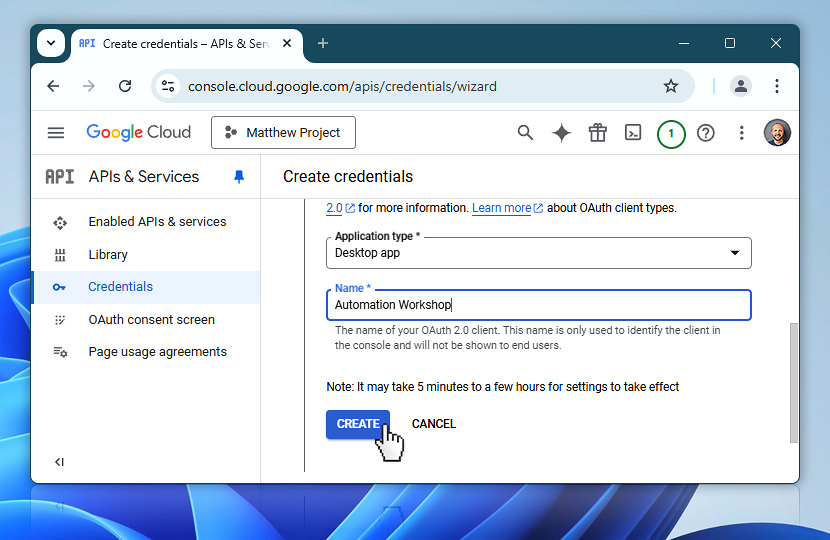
Credentials → Create OAuth client → Desktop app type
via FebootiGet a refresh token and note your IDs
Authorize once with the adwords scope to get a refresh token. Then note your Customer ID (the account to report on) and your login-customer-id (the Manager ID) — both digits only, no dashes.
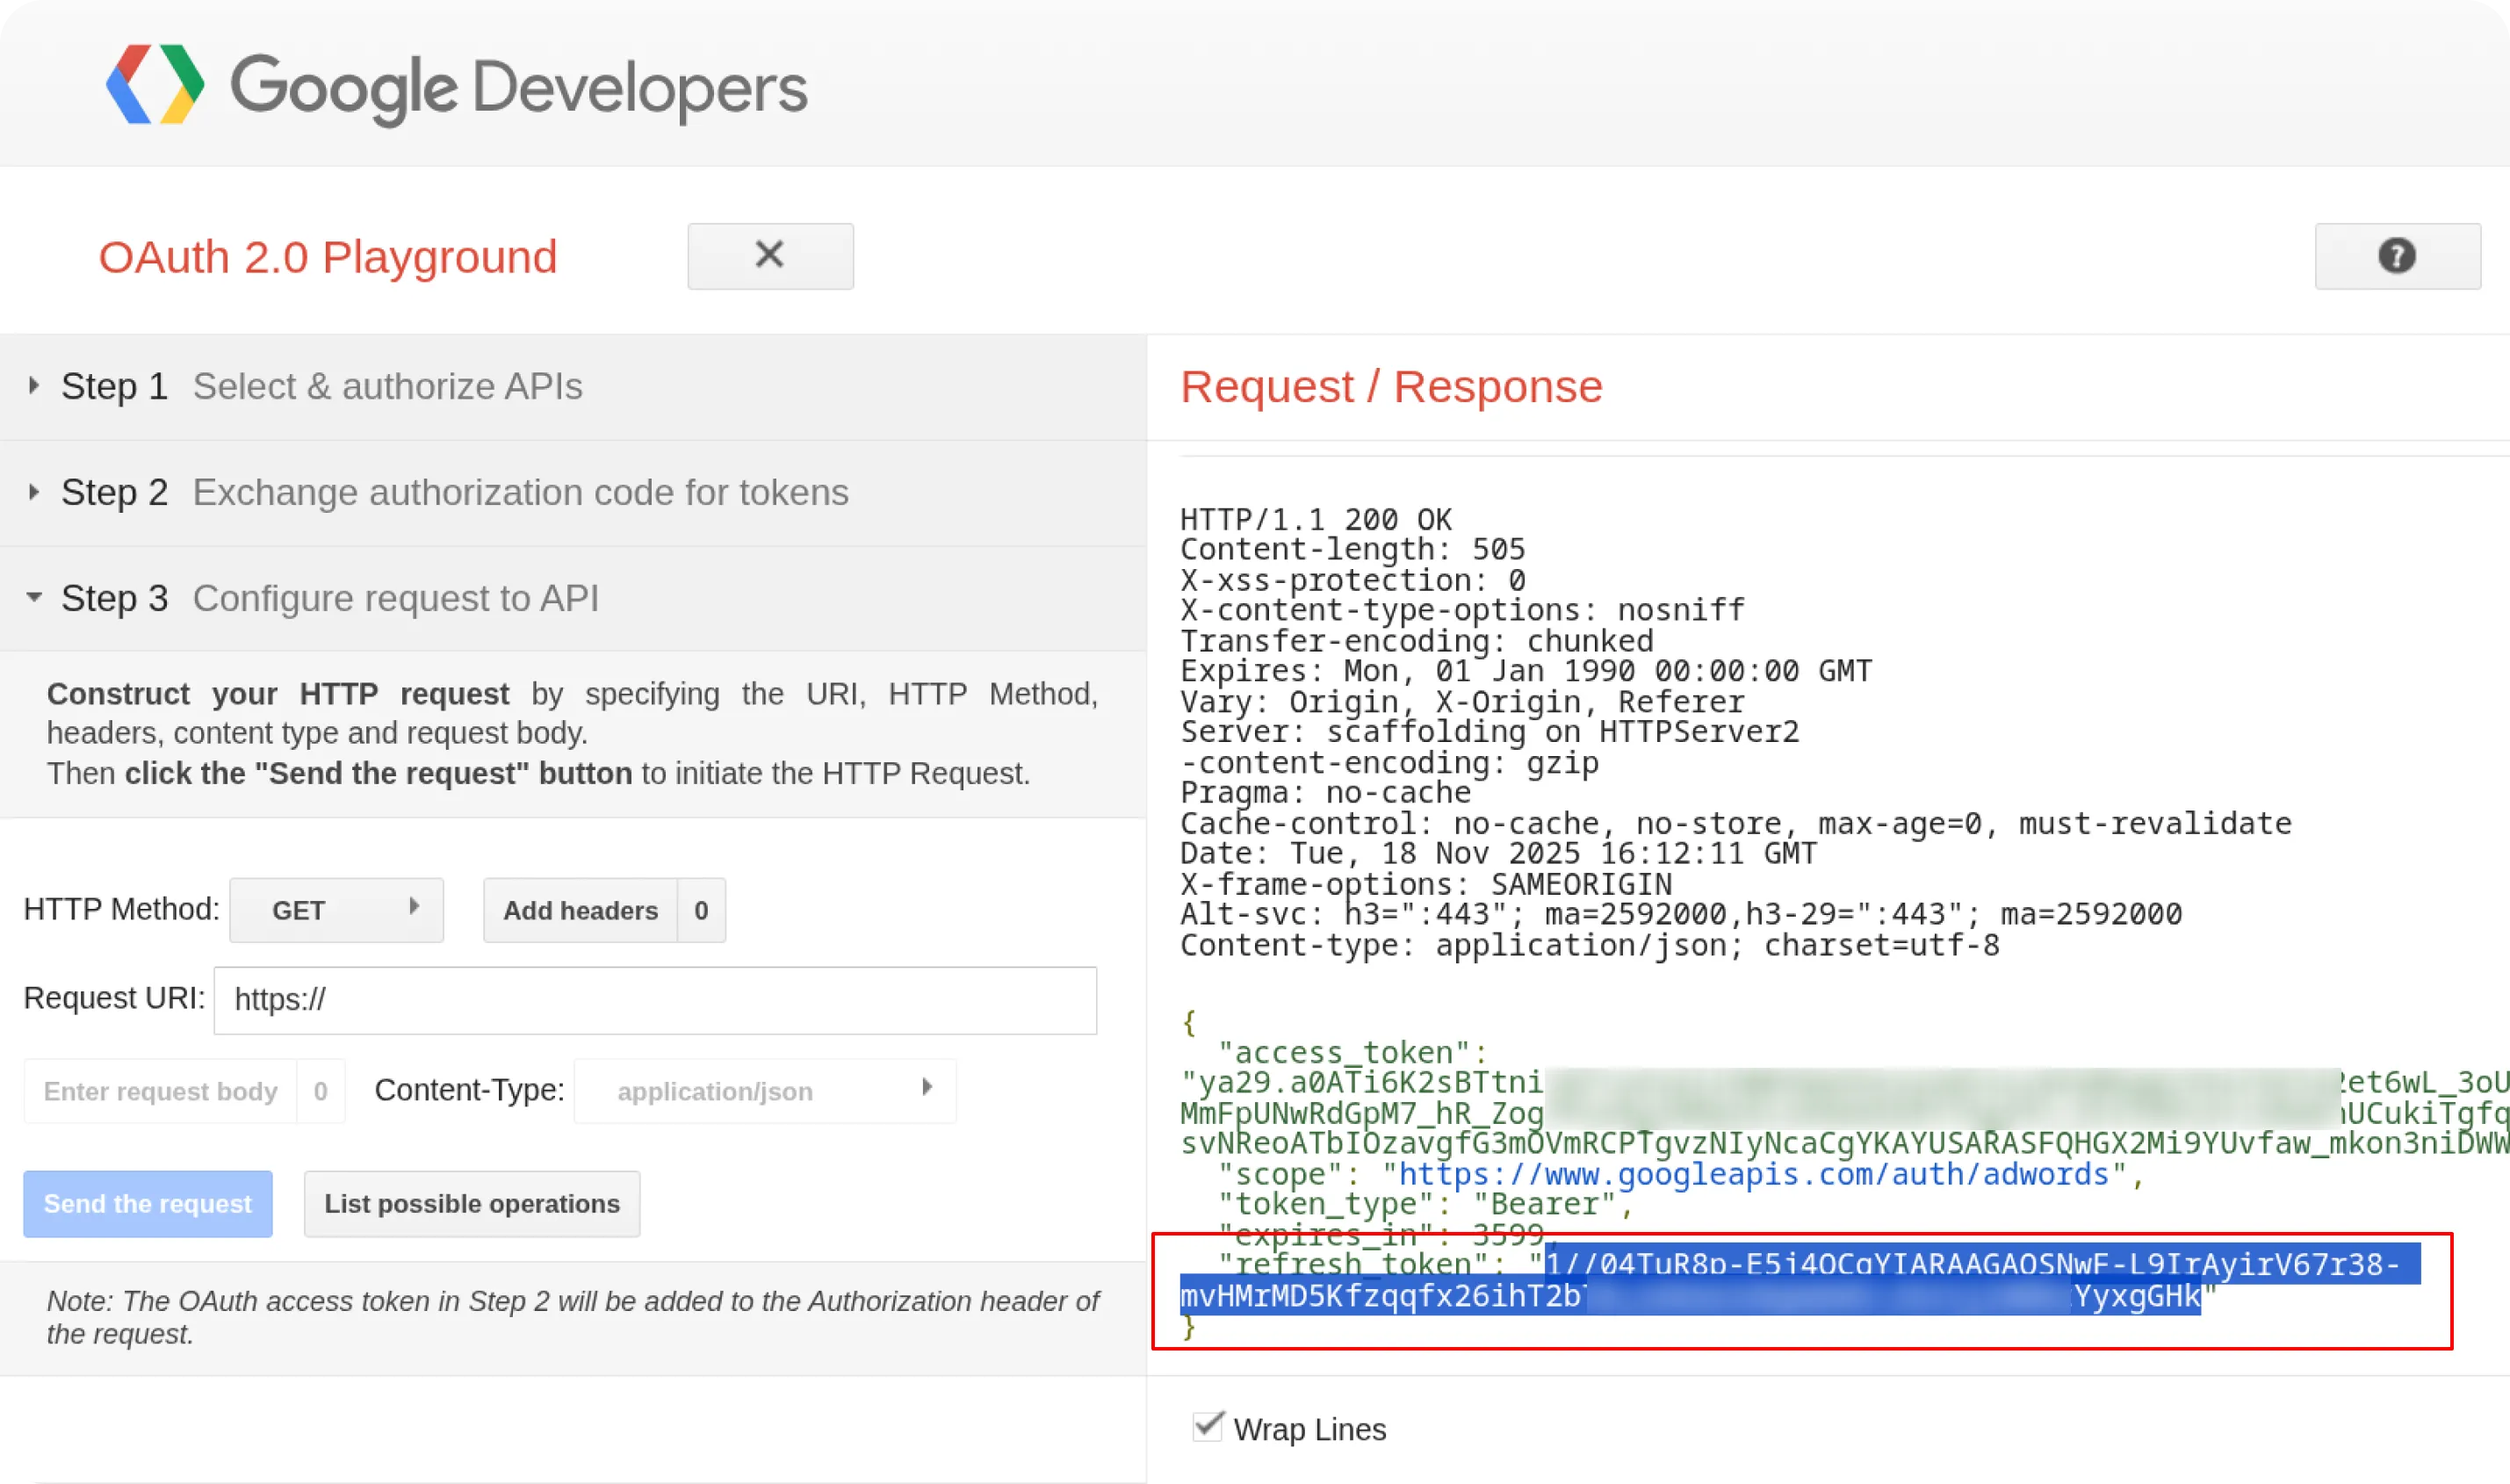
Refresh token returned after authorization — copy and save it
via OWOXYour one .env file
Drop the values you gathered into a single .env next to the skill. Leave out any platform you didn't connect — the report adapts.
# Meta
META_ACCESS_TOKEN=your-system-user-token
META_AD_ACCOUNT_ID=act_1234567890

# Google Analytics + Drive (one service account)
GA4_PROPERTY_ID=123456789
GOOGLE_CREDENTIALS_JSON=./service-account.json
REPORT_DRIVE_FOLDER_ID=your-shared-drive-id

# Google Ads (optional)
GADS_DEVELOPER_TOKEN=your-developer-token
GADS_CLIENT_ID=your-client-id.apps.googleusercontent.com
GADS_CLIENT_SECRET=your-client-secret
GADS_REFRESH_TOKEN=your-refresh-token
GADS_CUSTOMER_ID=1234567890
GADS_LOGIN_CUSTOMER_ID=1234567890
One command
In Claude Code, type /ads-report. Claude asks a couple of quick questions — is this a store or a local business, which conversions count, what are your targets (with sensible defaults) — then pulls your accounts and writes the Sheet and PDF to your Drive.
# Start Claude Code
claude

# Then type:
/ads-report
If something breaks — what it means
The five things people hit most, and the exact step that fixes each.
Meta token returns nothingThe app or the ad account isn't assigned to your system user. Assign both (Connect Meta, steps 4).
403 storageQuotaExceeded (Drive)You pointed it at a normal "My Drive" folder. Service accounts can't own files there — use a Shared Drive (Turn on Drive export, step 13).
GA4 permission deniedThe service-account email isn't on the property. Add it as a Viewer in GA4 Property Access Management (step 10).
DEVELOPER_TOKEN_PROHIBITEDYour Google Ads token is bound to a different Cloud project. Use a clean, dedicated project (step 18).
redirect_uri_mismatch (Google Ads)You created a Web OAuth client. Recreate it as a Desktop app (step 19).
Be first to run it
The /ads-report skill is in final testing. Add your details and I'll send it to you the moment it's ready — the setup guide above is here now if you want to connect your accounts in advance.
Built and used on real client campaigns by Anastasios Tzenos
Anastasios Tzenos
I build Google Ads systems and AI tools for local service businesses at Ad-Hive. These skills run live on client campaigns. I publish what I build because the agency world hoards too much. More skills coming — follow me on LinkedIn to see them first.